Configuring Custom Fields
Custom fields can be configured to appear in custom forms throughout the system.
Note: A maximum of 75 custom fields total can be created in each instance of re:Members AMS.
-
Navigate to the Customizations App > Custom Forms.
Note: In the case of itemized custom fields, begin from the Product Record, instead. See the help topic for more information.
-
Depending on the type of entity data should be collected from, select the appropriate tab: Individual, Organization, Chapter, or Committee.
For example, to configure forms that collect data on organizations, choose the Organization tab to select from those forms. -
Click Custom Forms.
-
Locate the form to which custom fields should be added. Click Customize.
The Custom Form Builder will appear.
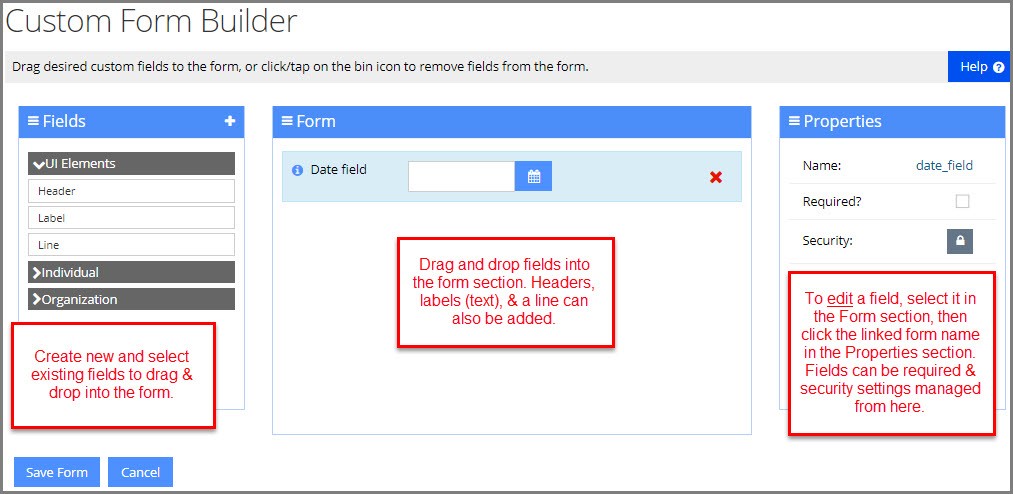
In the Fields section, drag and drop an existing field into the Forms section, OR create a new one by clicking the + icon.
Creating a New Field via the Custom Form Creator
-
Locate the Fields section and click the + icon. The Add Custom Field form will appear.
-
In the Category drop-down, choose the entity type (individual, organization, chapter, or commitee) that you want to collect data on using this field.
-
Enter a Field Caption. This is the field name as it will appear for customers purchasing the product.
As a best practice, do not include punctuation or special characters in the Field Caption, as this can cause issues when querying custom fields. If necessary, used the Input Label (described below) for fields requiring these characters. -
Field Name auto-populates based on the Field Caption, and can be updated if necessary.
-
Field Data Type is the type of field used to collect the information. Options include:
-
Text: This data type accepts all character types and allows set up of text box, multi-line text box, check-box list, drop-down list, and HTML editor fields.
-
Integer: Accepts whole numbers (no decimals).
-
Decimal: Accepts numbers up to four decimal places.
-
Currency: Accepts currency in USD.
-
File: Allows file upload or linking to a document-containing URL.
-
Date: Causes a date-picker to appear.
-
Boolean: Causes a check-box to appear allowing yes/no input.
By default, custom fields that use a Boolean (yes/no) value remain null unless a value is selected. If a customer has not entered a value for a Boolean field, the system will not return any results—neither yes nor no—for such a customer.
When creating a new Boolean custom field, the Field Default Value drop-down allows staff to specify an auto-fill value if the customer has not made a selection.
-
ID: For use by system developers only.
-
-
Field Description text appears in a pop-up tooltip next to the custom field.
Use this to include a brief explanatory text on the field's purpose. If nothing is entered, the tooltip icon will not appear.
-
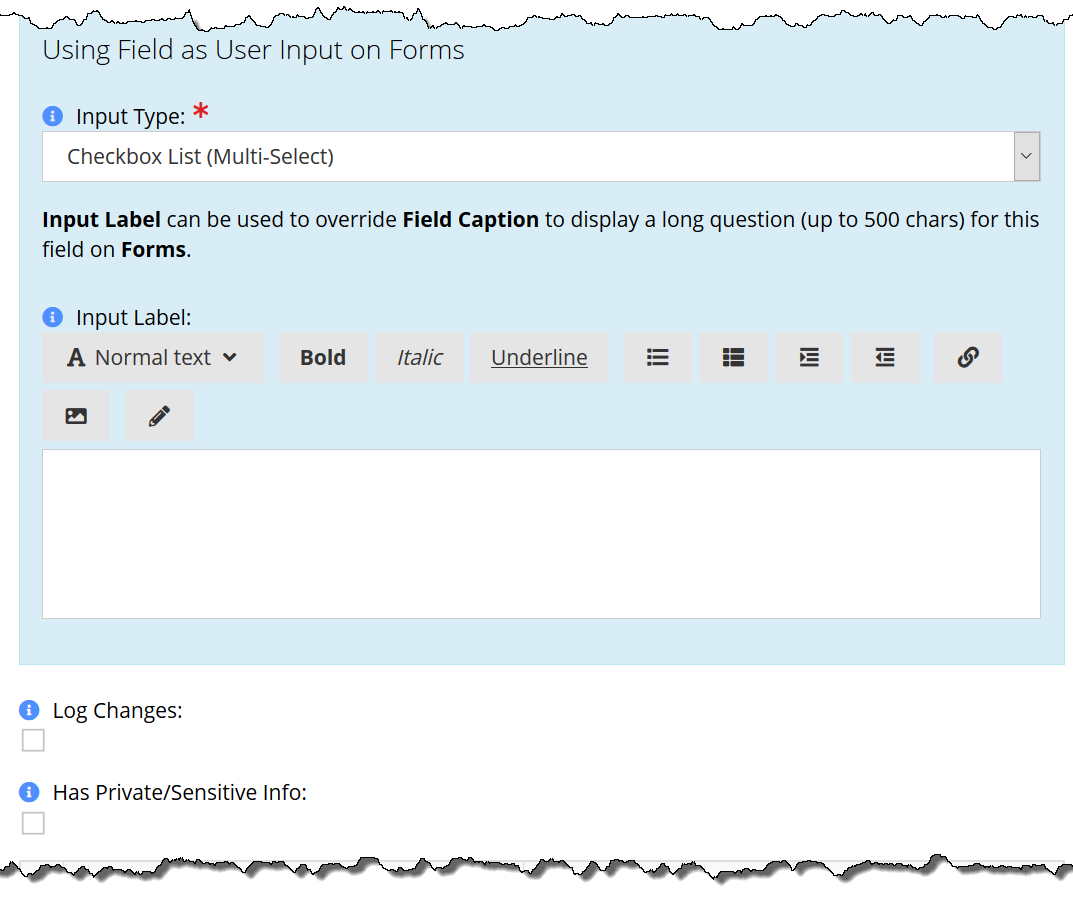
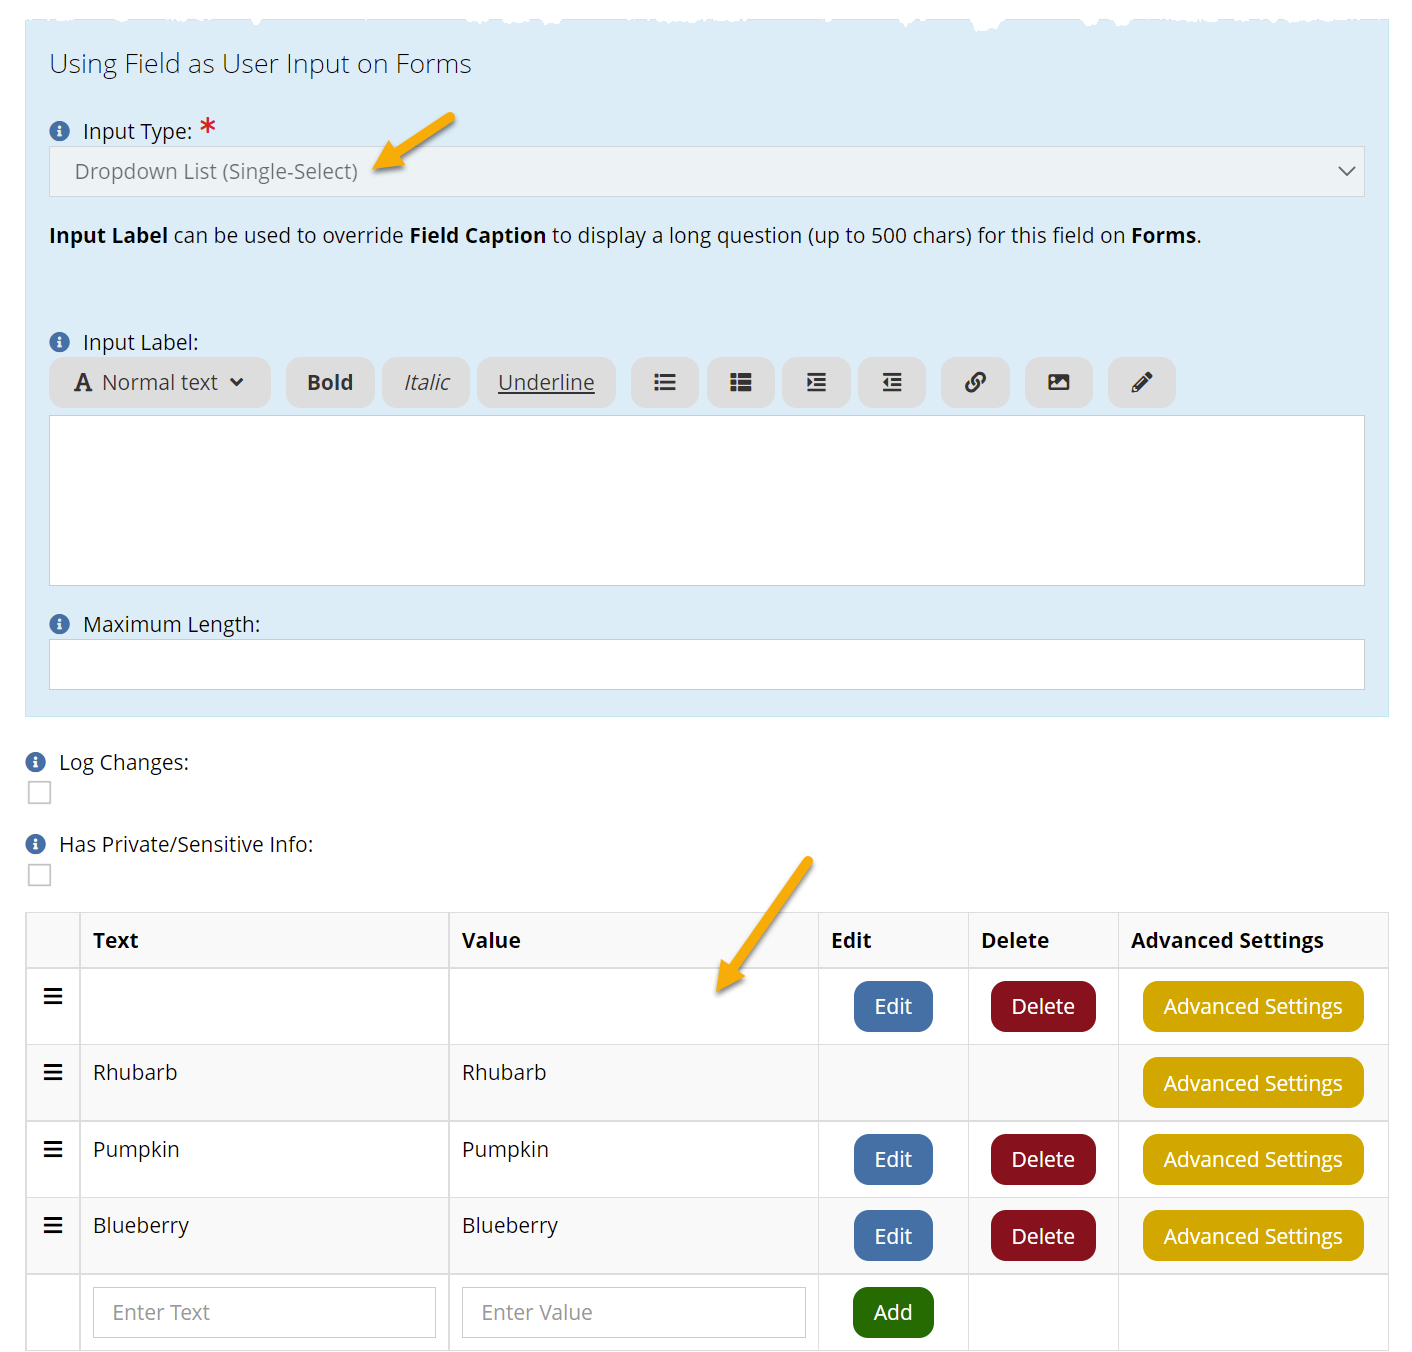
Choose the Input Type. Options in this drop-down field differ depending on the Field Data Type selected above.
-
A long-form Input Label can be entered (if necessary) to overwrite the Field Caption, such as to add special characters or font formatting to the displayed text.
-
The Log Changes checkbox causes the system to track changes to the field in the Customer Record > Account tab > Additional Info menu option > Change Logs table.
-
The Has Private/Sensitive Info check-box causes the information in this custom field to be pseudonymized when the "Forget this Customer" button is clicked on the customer record.

-
Response values on multi-answer fields can be made inactive after a specified date. Click Advanced Settings next to the option to be deactivated. Save an end date, after which time the option will be removed.
Using this method, all historical values are preserved and can be queried, while the option is no longer available for future selection.
Note: When using the Dropdown List (Single-Select) multi-answer type, the first option in the drop-down list should be a blank option or the instruction to select the desired setting. This configuration ensures that the system does not automatically save the first option in the list without the user's input.
-
Click Save. The Add Custom Field form will close.
-
-
Once the new field is created, it will appear under the Fields table. Locate the field you created in the list—it will appear as the Field Caption name you created.
-
Drag and drop the field into the Form area in the center of the page.
-
Click Save Form.
Note: Functionality to have a field appear based solely on the answer to a previous field requires additional configuration. Please contact customer support.